Stain Color Matching: How a Custom Finish Is Built
· Dale's Furniture Refinishing
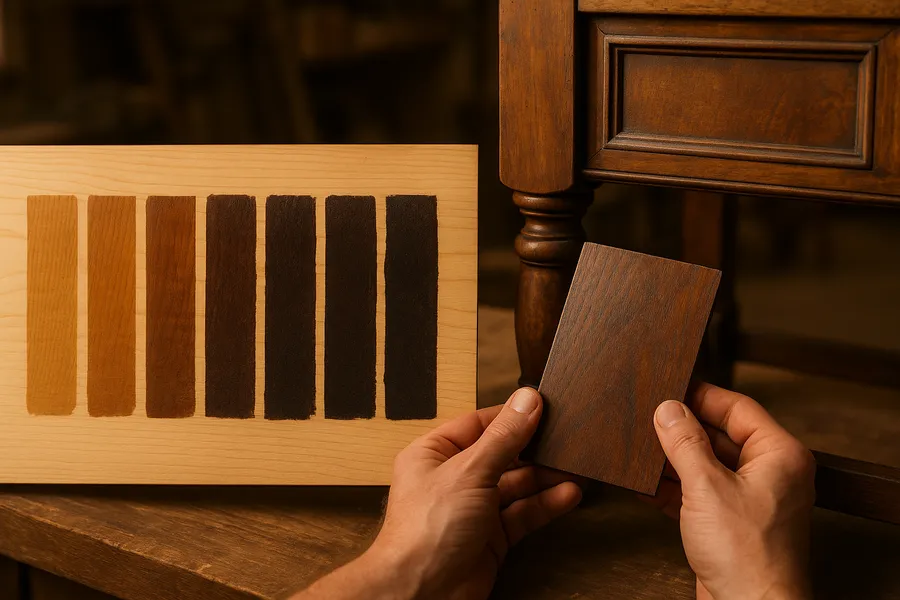
Somebody brings me a dresser missing one drawer front. A carpenter friend built a new one out of the same kind of wood, they wiped on the same can of stain the old finish supposedly used, and it came out three shades too light and a little too orange. Then they ask the question I hear a couple times a month: “Why won’t it match?”
Here is the short answer, up front, so nobody spends another weekend fighting it. A matched finish is built, not bought off a shelf. There is no single can with the right color already in it. Color on wood is something you assemble in layers, testing as you go, until your eye says it is right. Once you understand that, the whole thing stops being frustrating and starts making sense.
Why one can of stain almost never matches
The mistake is thinking the color lives in the can. It does not. The color you see is a partnership between the stain and the wood underneath, and the wood does most of the talking.
The same stain reads completely differently depending on the species. Wipe one color on oak, walnut, pine, maple, and cherry and you get five different results:
- Oak has open, hungry grain that drinks stain and shows a lot of contrast.
- Walnut is already dark and brown on its own, so stain barely shifts it.
- Pine and maple are tight and blotchy, and they can grab stain unevenly and go splotchy on you.
- Cherry is famous for changing on its own, darkening and reddening with age and light no matter what you put on it.
On top of the species, there is age. Old wood is not the color it was the day it was built. Decades of light, oils, oxygen, and old finish have darkened and warmed it. So when you match a new part to an old piece, you are not matching your stain to fresh lumber. You are matching it to fifty or eighty years of aging the new part has not lived through yet. That gap is exactly why the new drawer front looked wrong. The wood was innocent and the stain was fine, but the history did not line up.
The tools I use to build a color
Matching is not one product, it is a small toolbox, and each tool does a different job.
- Pigment stain. Ground-up color, like fine paint, that settles into the grain and pores. It gives body, hides a little, and makes open grain pop.
- Dye. Transparent color dissolved in liquid. It soaks in and colors the wood itself without muddying the grain, so it is how you nail a clean, bright, or deep tone. I lean on dyes for tricky matches.
- Toner. A little color mixed into the clear coat and sprayed on. Instead of coloring raw wood, it floats a whisper of color across the whole surface, nudging something warmer, cooler, or a hair darker after the base is down.
- Glaze. Color you wipe on over a sealed coat, then wipe most of it back off. It stays in the corners, grain, and recesses, which adds depth and the settled-in look old furniture has.
- The topcoat. The clear finish is not just protection, it changes the color too, and the sheen matters more than people expect. A flat finish reads lighter and softer, a gloss reads deeper and richer, and satin sits between. The same color under gloss versus flat can look like two different browns, so I match the sheen, not just the stain.
Put simply, dyes and pigments set the foundation, toners and glazes do the fine tuning, and the topcoat and sheen are the final word on how the color reads.
How the matching actually goes, step by step
People picture me stirring one magic can. What I really do is slower and a lot more boring, and that is the whole trick.
- Identify the wood. First I figure out what I am working with, oak or walnut or cherry or a maple pretending to be something else. The species tells me whether to start with dye or pigment and what to watch out for.
- Test on something hidden, never the piece. I do not test color on the show surface. I use the back of a leg, the inside of a door, or best of all a scrap board of the same species. That sample board is my proving ground, and every color gets tried there first.
- Build the color in stages. I lay a base coat that gets me most of the way, let it dry, and look at it in good light. Then I adjust with a toner or a glaze, a little at a time. I would rather sneak up on the color in three light passes than dump one heavy coat and blow past it.
- Lock it under the topcoat. Once the sample matches, I put clear over it, because the topcoat shifts the color. I judge the match with the clear on, in the same sheen the finished piece will wear, not on bare stained wood.
The rule under all of that is patience. Build up slowly. You can always add more color, but you can rarely subtract, so slow and light wins every time. This is the same care I bring to any full furniture refinishing job, where the color has to flow across a whole piece and look like it grew that way.
The jobs where this really earns its keep
Color matching shows up in a few very common situations, and they are not equally hard.
- Blending in one new or repaired part. A replacement drawer front, a patched section of veneer, a turned leg somebody reglued. The rest of the piece is the target and I make one fresh part disappear into it.
- Matching a piece to a room. Somebody wants a refinished table to live happily next to chairs or a hutch they already own, so I match the new finish to furniture already there.
- Matching new cabinets to an existing set. When a kitchen gets an addition or a repair, the new kitchen cabinet refinishing work has to sit next to the old doors and read as one kitchen. Cabinets are unforgiving because they hang side by side in bright light where any mismatch jumps right out. If you are weighing your options there, I broke down the numbers in the cost comparison of refinishing vs refacing vs painting cabinets.
Of these, matching one part into an existing old finish is the hardest, because I am chasing something the wood earned over decades and I only have a few hours to get there. It is also the most satisfying work I do. When a customer runs a hand across the top and honestly cannot tell me which drawer front is the new one, that is the whole job right there.
Why a pro gets a seamless result
I will be straight with you. There is no formula I can hand you. I cannot write down “two parts this, one part that” and promise a match, because the wood, the age, the light, and the old finish are different on every piece. What gets the seamless result is knowing which tool to reach for, testing on a sample instead of gambling on the real thing, and having the patience to build the color up in thin layers until the eye is satisfied. That is skill and time, and it is why a matched finish looks like it was always there instead of looking patched. If you have wondered whether the effort is worth it, I laid out my thinking in what refinishing a piece is worth vs buying new.
Let’s match your finish
If you have a piece that needs a color matched, a repair blended in, or new cabinets brought into line with an old set, I would be glad to take a look. Bring it by the shop at 622 Como Ave #1 in Saint Paul, or call me at (651) 748-9465 and tell me what you are working with. You can also reach out through the contact page for a free estimate. I have been building custom finishes by hand for more than forty years, and I would rather test on a sample board a dozen times than hand you something that does not match.